How to Carve Your Fermín Bone-In Ham Like a Pro
Few things make a statement quite like a whole bone-in Ibérico or Serrano ham. Whether it is the centerpiece of your holiday spread or a gift for a true gourmand, carving it the right way transforms the experience from impressive to unforgettable.
Fermín hams are cured for up to 36 months in the mountain air of La Alberca, Spain, a UNESCO-protected village known for its pristine microclimate and centuries-old curing tradition. Each ham reflects years of care, patience, and craftsmanship. Carving it is both a ritual and an art form that rewards you with wafer-thin slices that melt in your mouth and fill the room with rich, nutty aroma.
Here is how to carve your Fermín bone-in ham like a maestro jamonero.
Step 1: Inside the Jamón
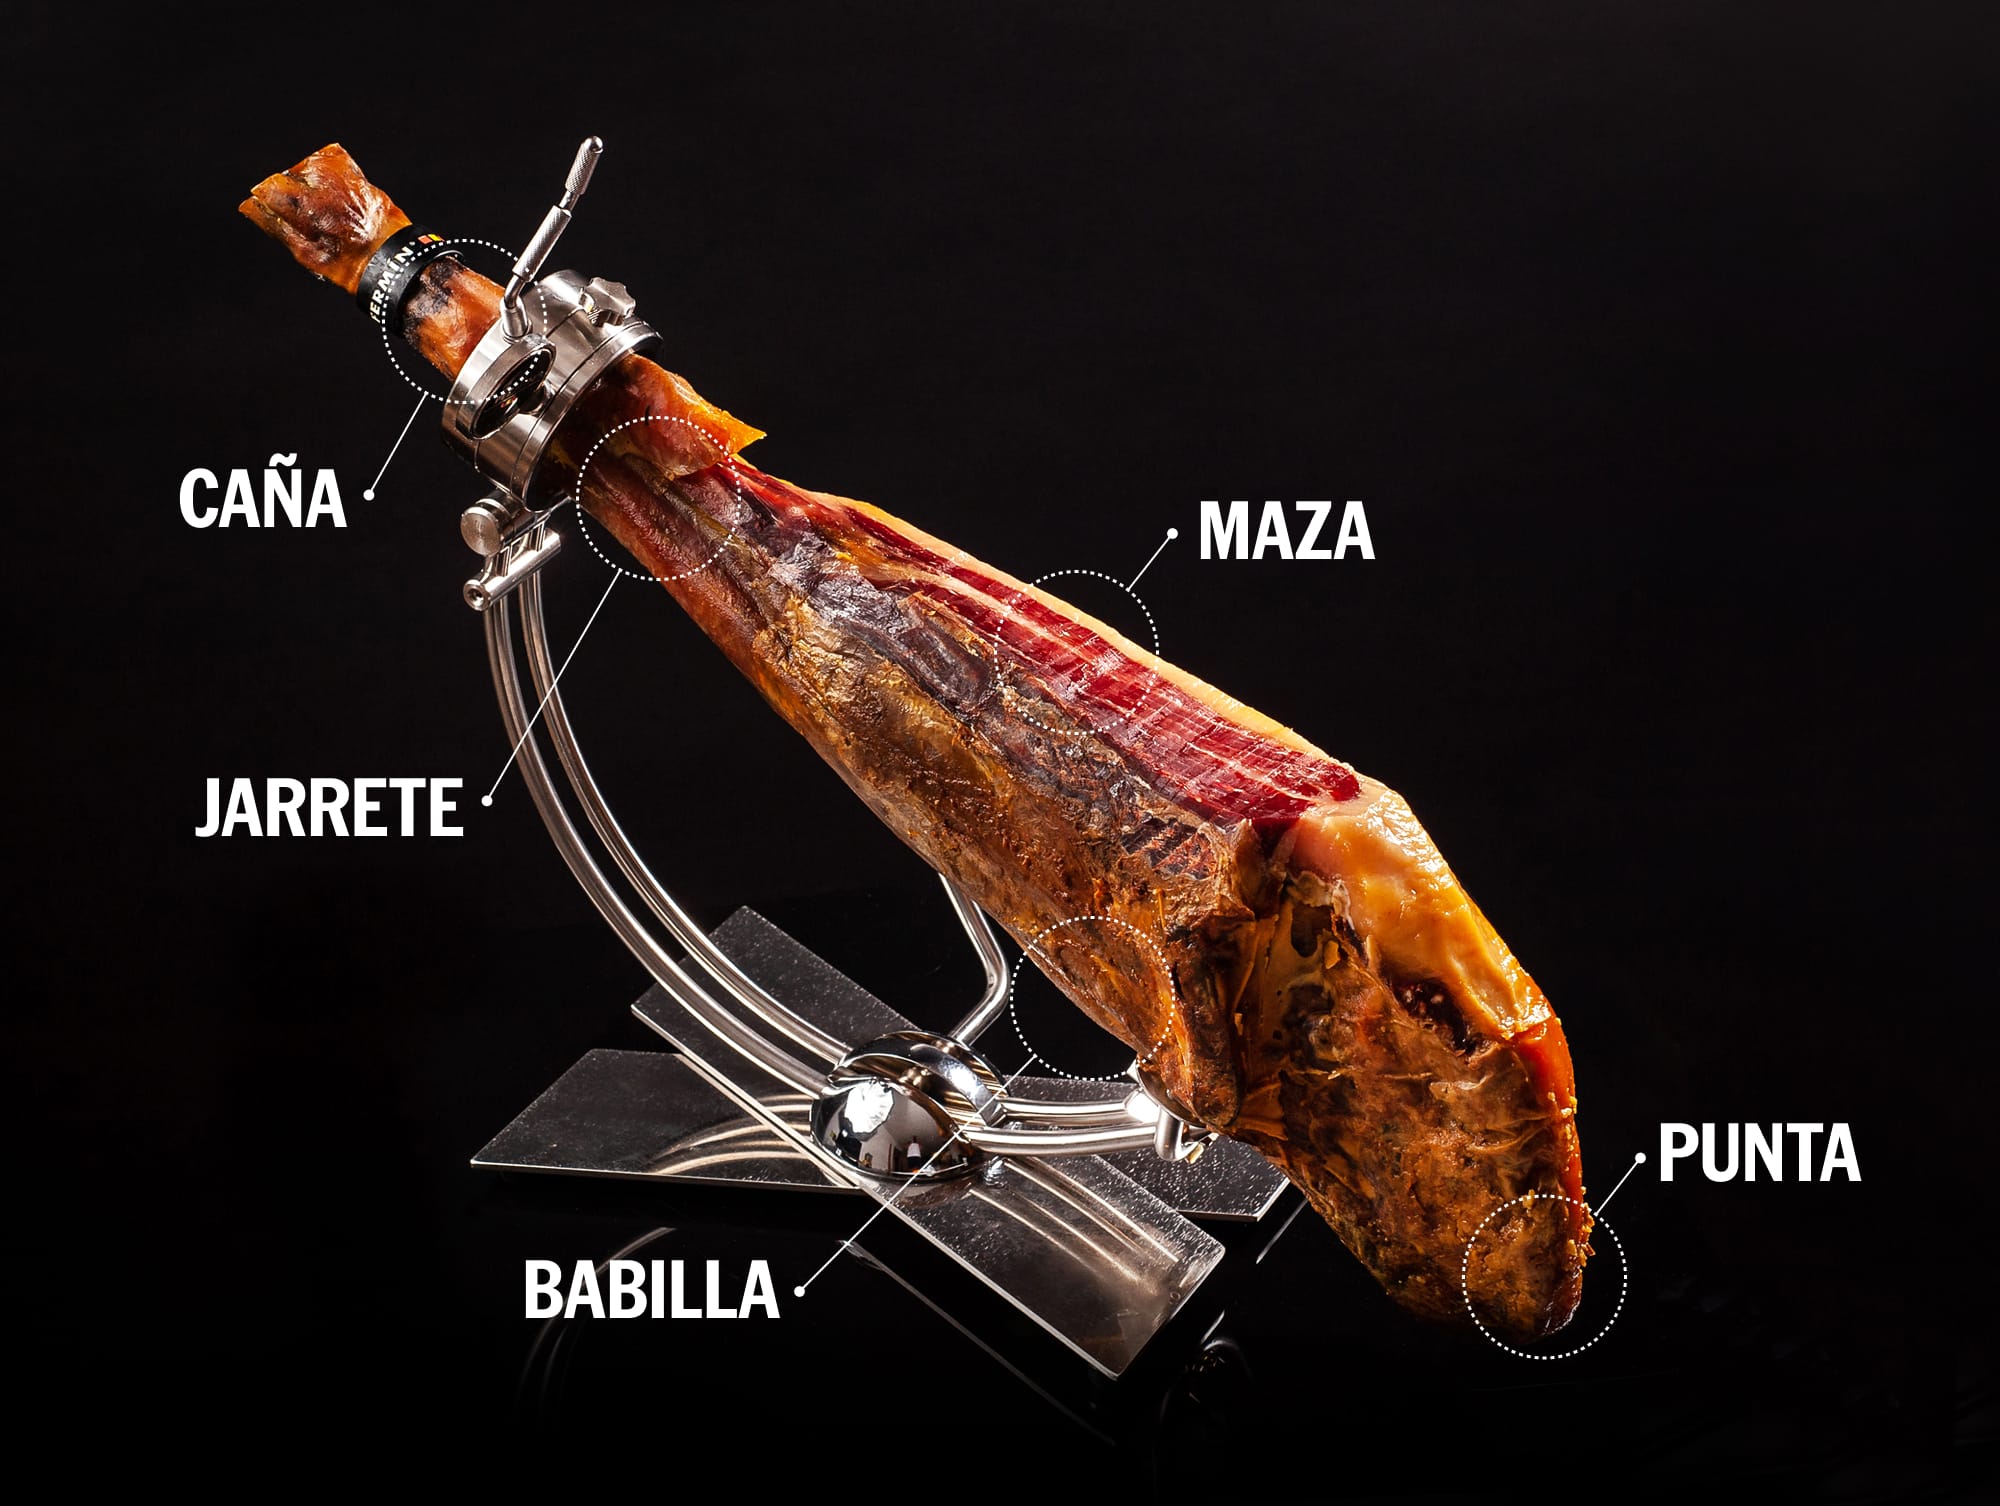
Understanding where each flavor lives helps you carve more confidently and waste nothing.
- Maza – The largest, most marbled section; start here for silky, juicy slices.
- Contramaza – On the opposite side; slightly drier with deeper cured notes.
- Babilla (stifle) – Leaner, concentrated in flavor; slice a bit thinner.
- Punta (tip) – Intense and nutty; the perfect section for tapas or snacks.
- Jarrete – Closer to the hoof; fibrous but flavorful, great for soups or croquettes once sliced clean.
Step 2: Gather Your Tools and Set Up Your Station

To carve like a professional, start with the proper setup:
- Ham stand (jamonero) – Holds the leg steady and secure for precise cutting (available here).
- Wide-blade knife: Used for removing rind and outer fat before slicing.
- Long, flexible carving knife – For those signature paper-thin slices (available here).
- Small boning knife – To work around bones and joints.
- Sharpener or honing steel – A razor-sharp edge keeps every cut clean.
Make a shallow circular cut just below the codillo (knuckle) before trimming to create a clean starting line for slicing.
If you will finish the ham within a few days, place the hoof upward to start with the maza, the juiciest side. If you plan to enjoy it over a longer period, place the hoof downward to begin with the contramaza and babilla, which keep longer.
Let the ham rest at room temperature for 30 to 45 minutes before carving. The fat should glisten slightly, indicating that it is soft enough to release all its flavor.
Step 3: Clean and Prepare the Ham
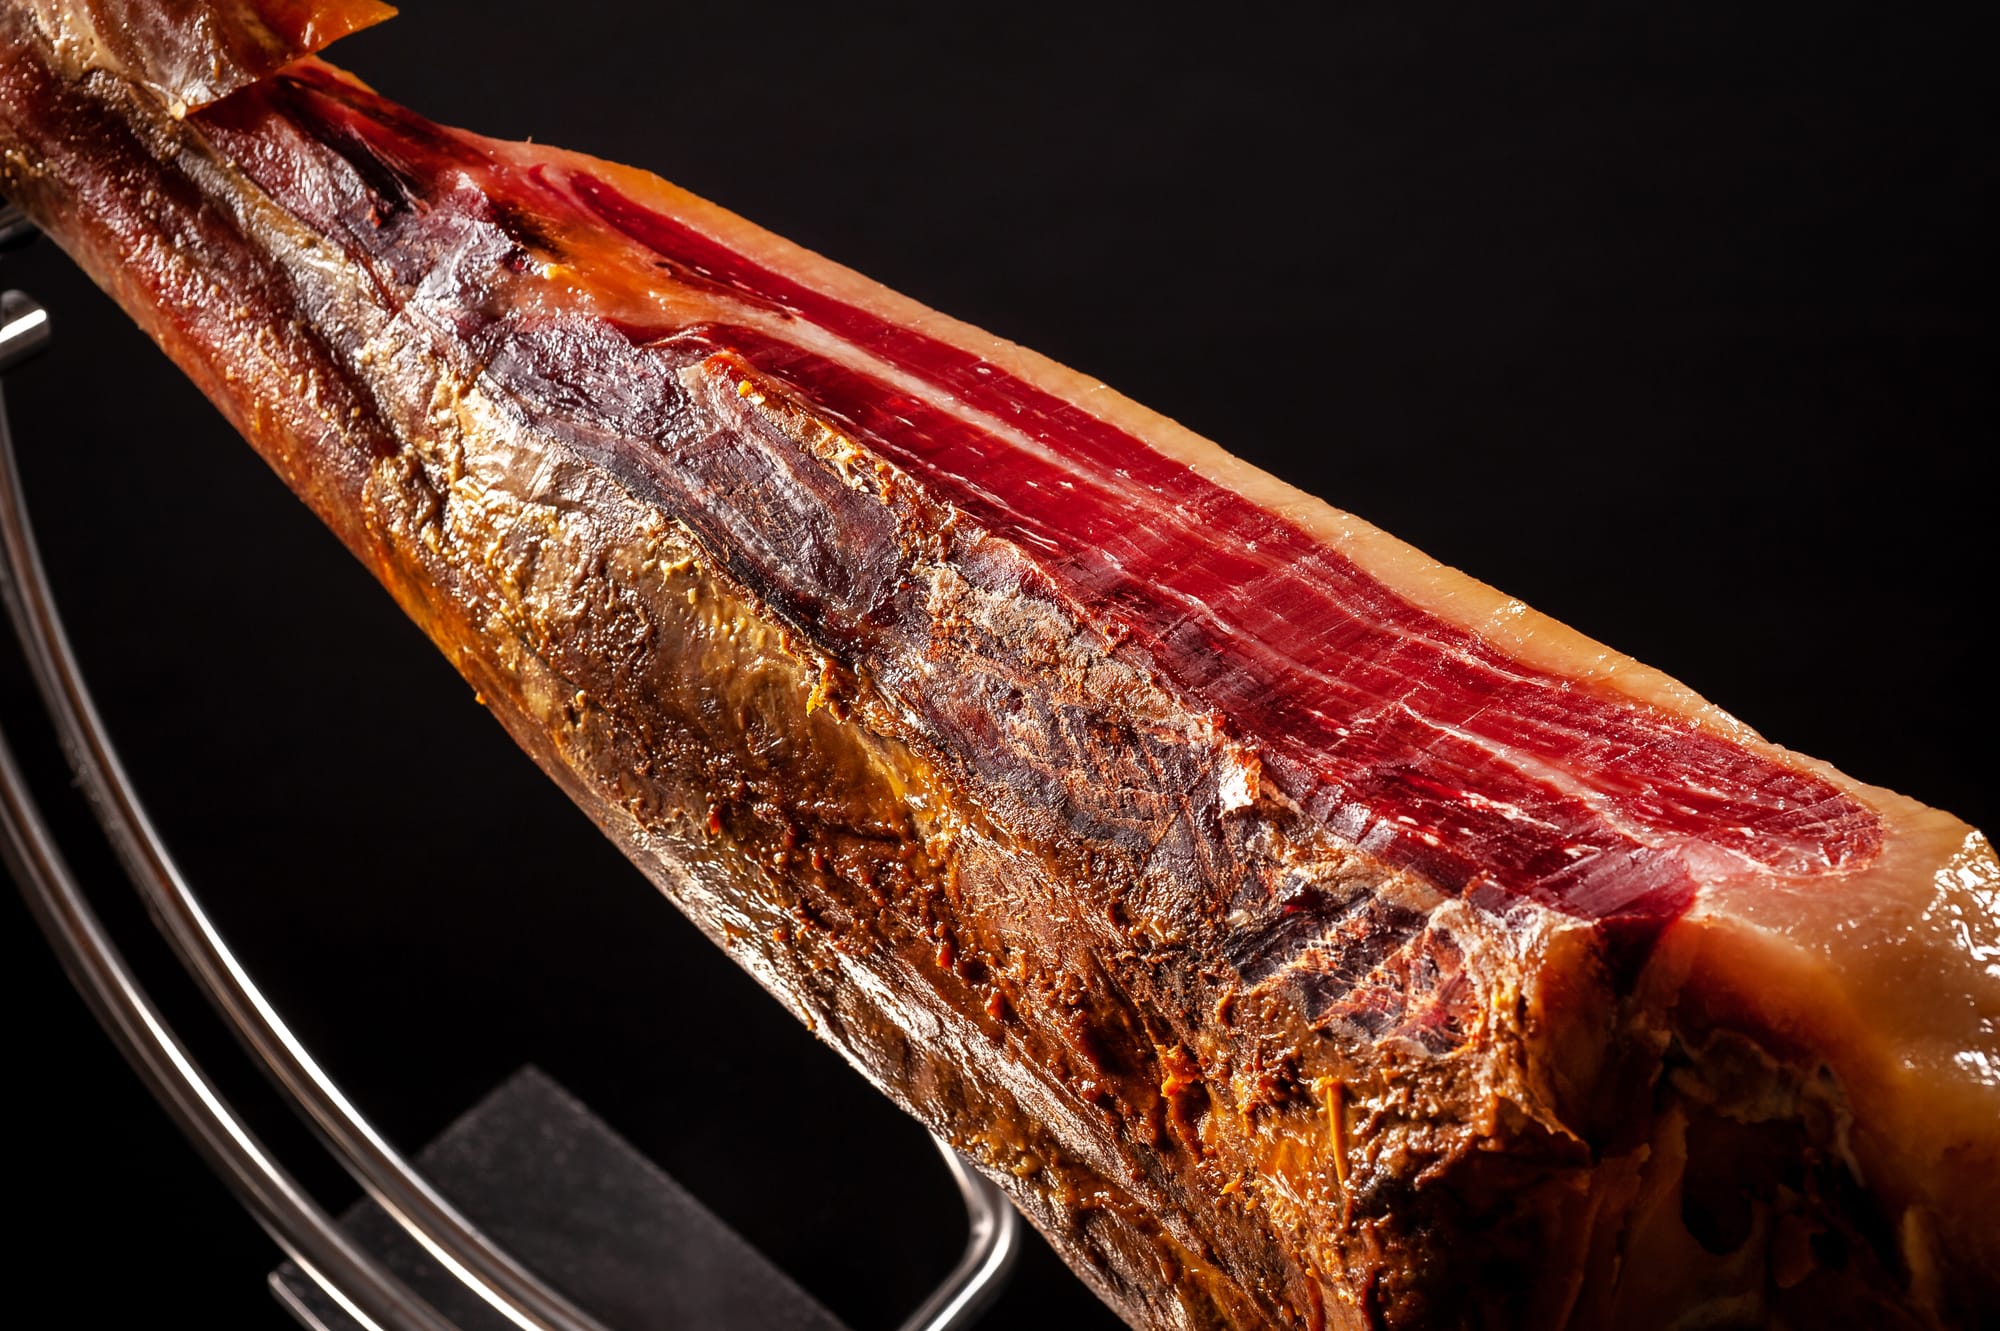
Using your smaller knife, trim away the outer rind and any yellowed fat from the area you’ll carve. Do not remove it all at once, only clean the surface you will be slicing today.
Leave a thin layer of the white intramuscular fat underneath. This marbled fat is what makes Fermín’s Ibérico hams so luxurious; it keeps each slice moist and carries that signature acorn-sweet aroma.
Pro tip: Reserve a few large sheets of trimmed fat. You’ll use them later to cover the exposed area and protect it between carving sessions.
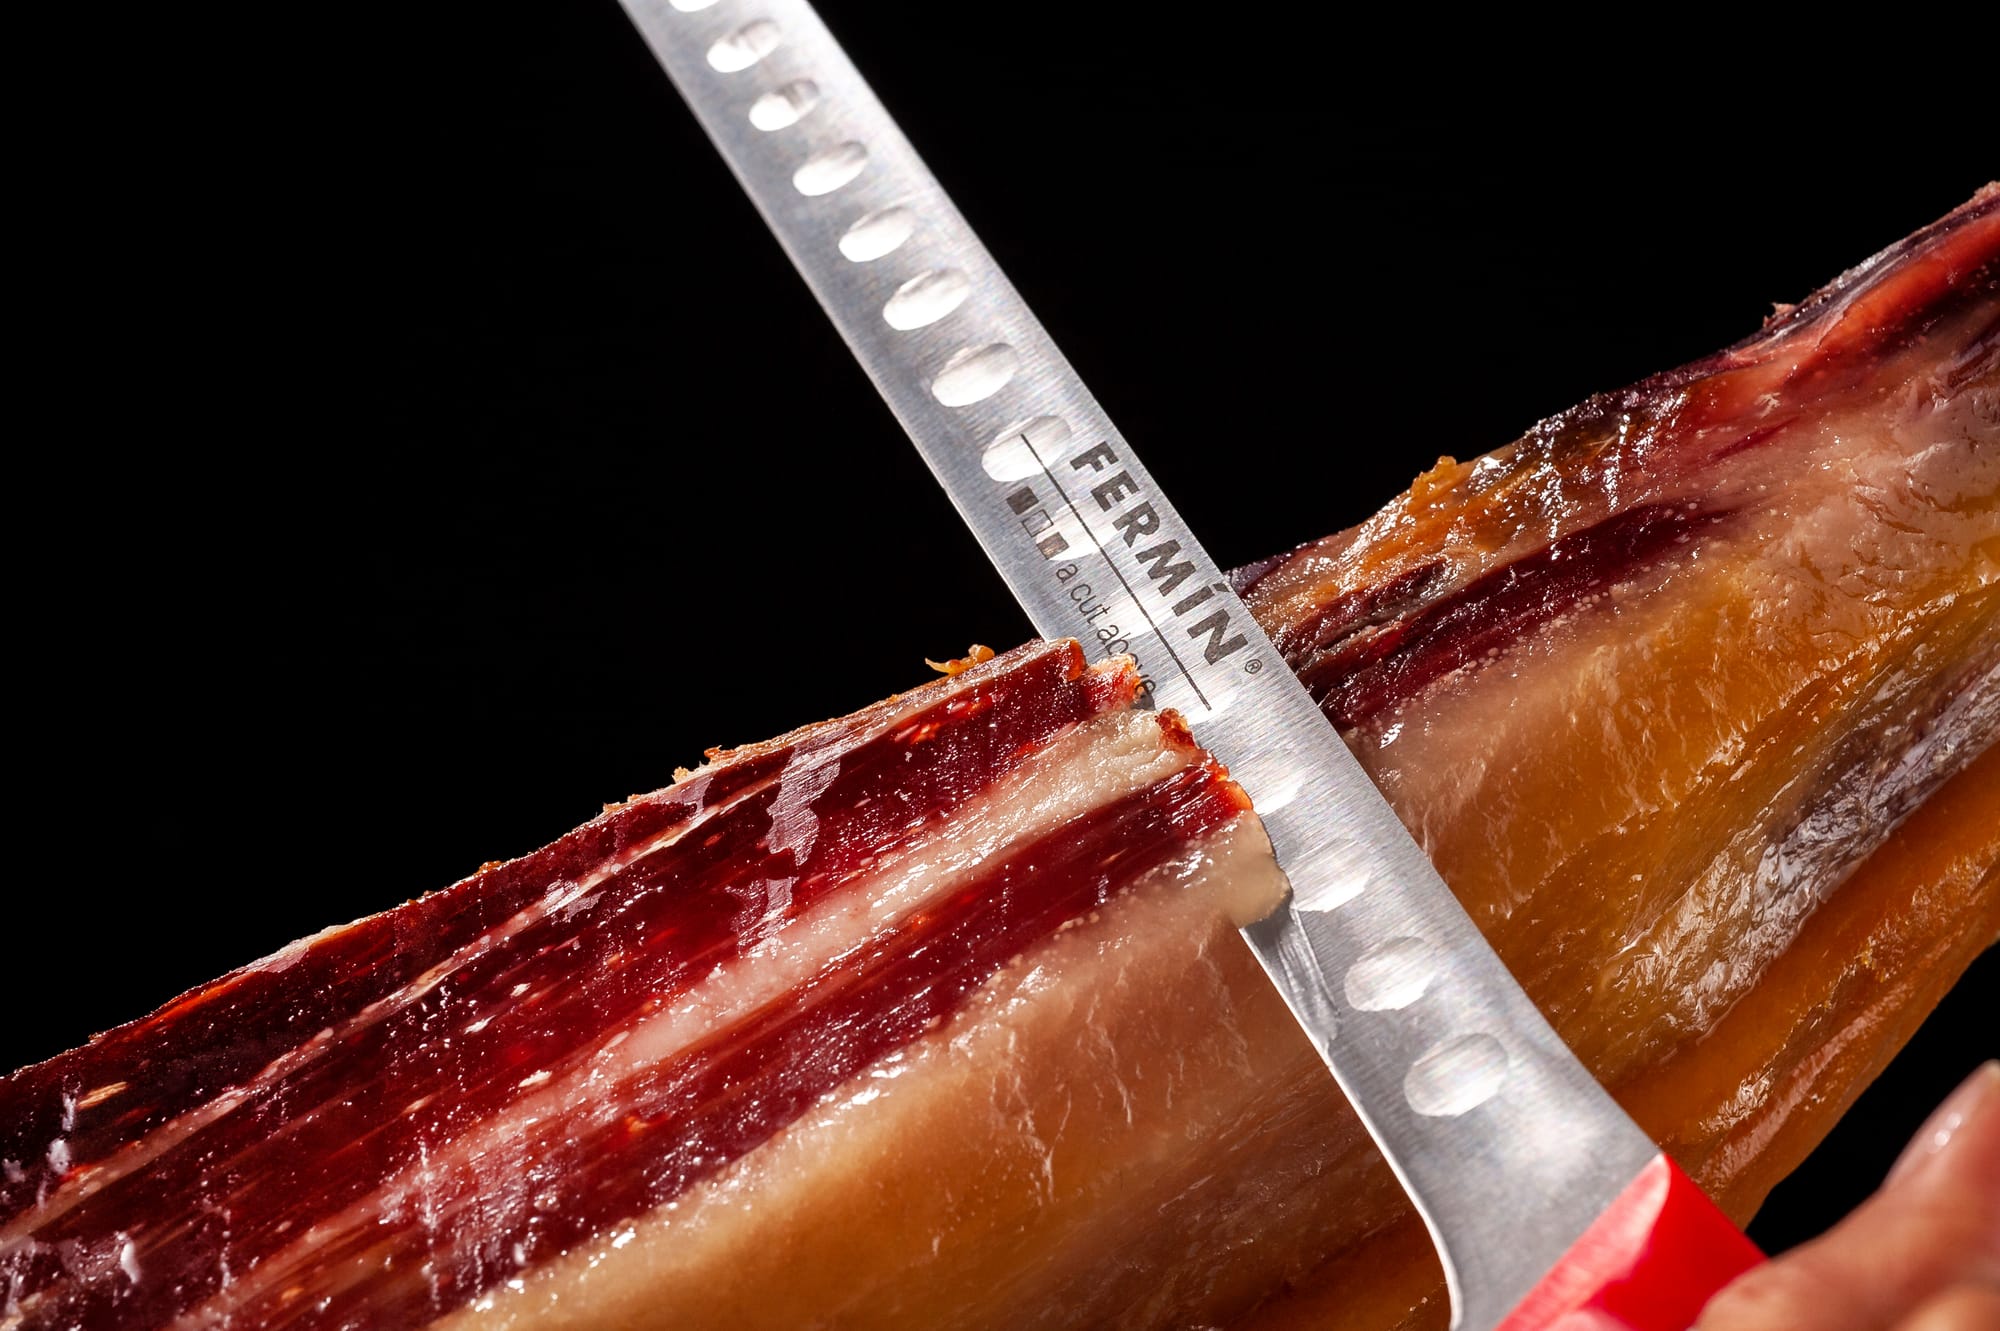
Step 4: Carve with Precision
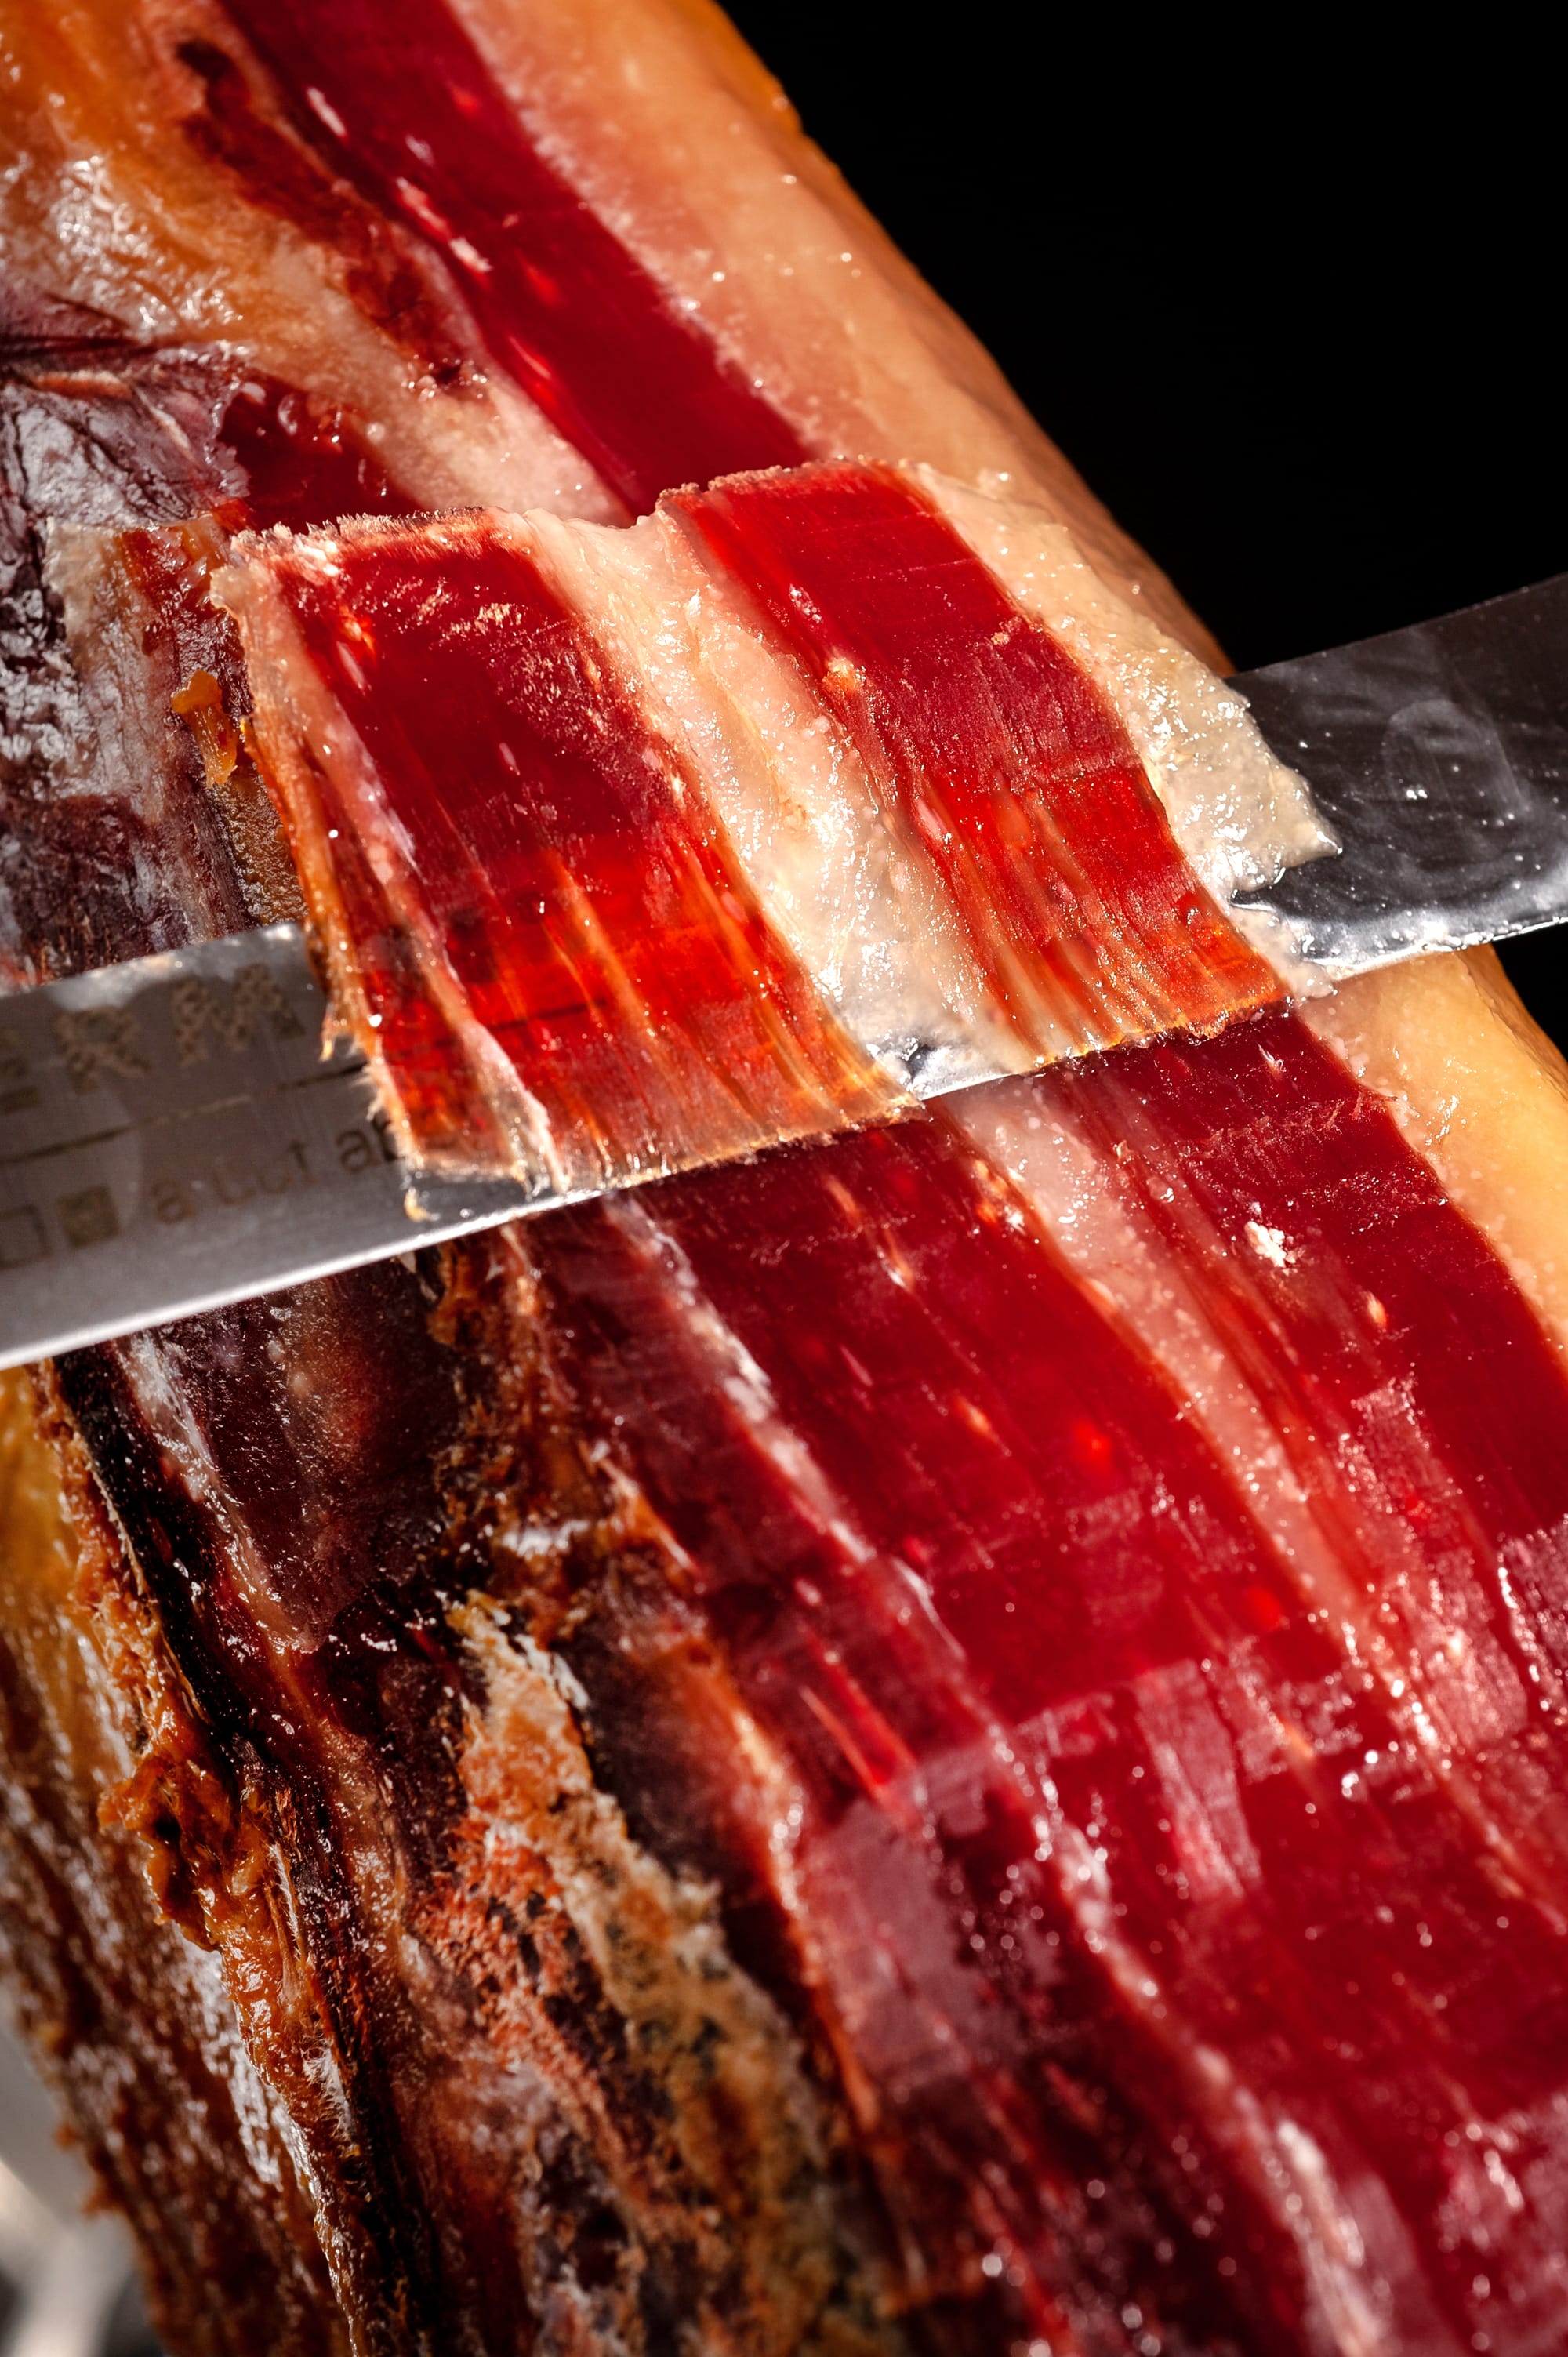
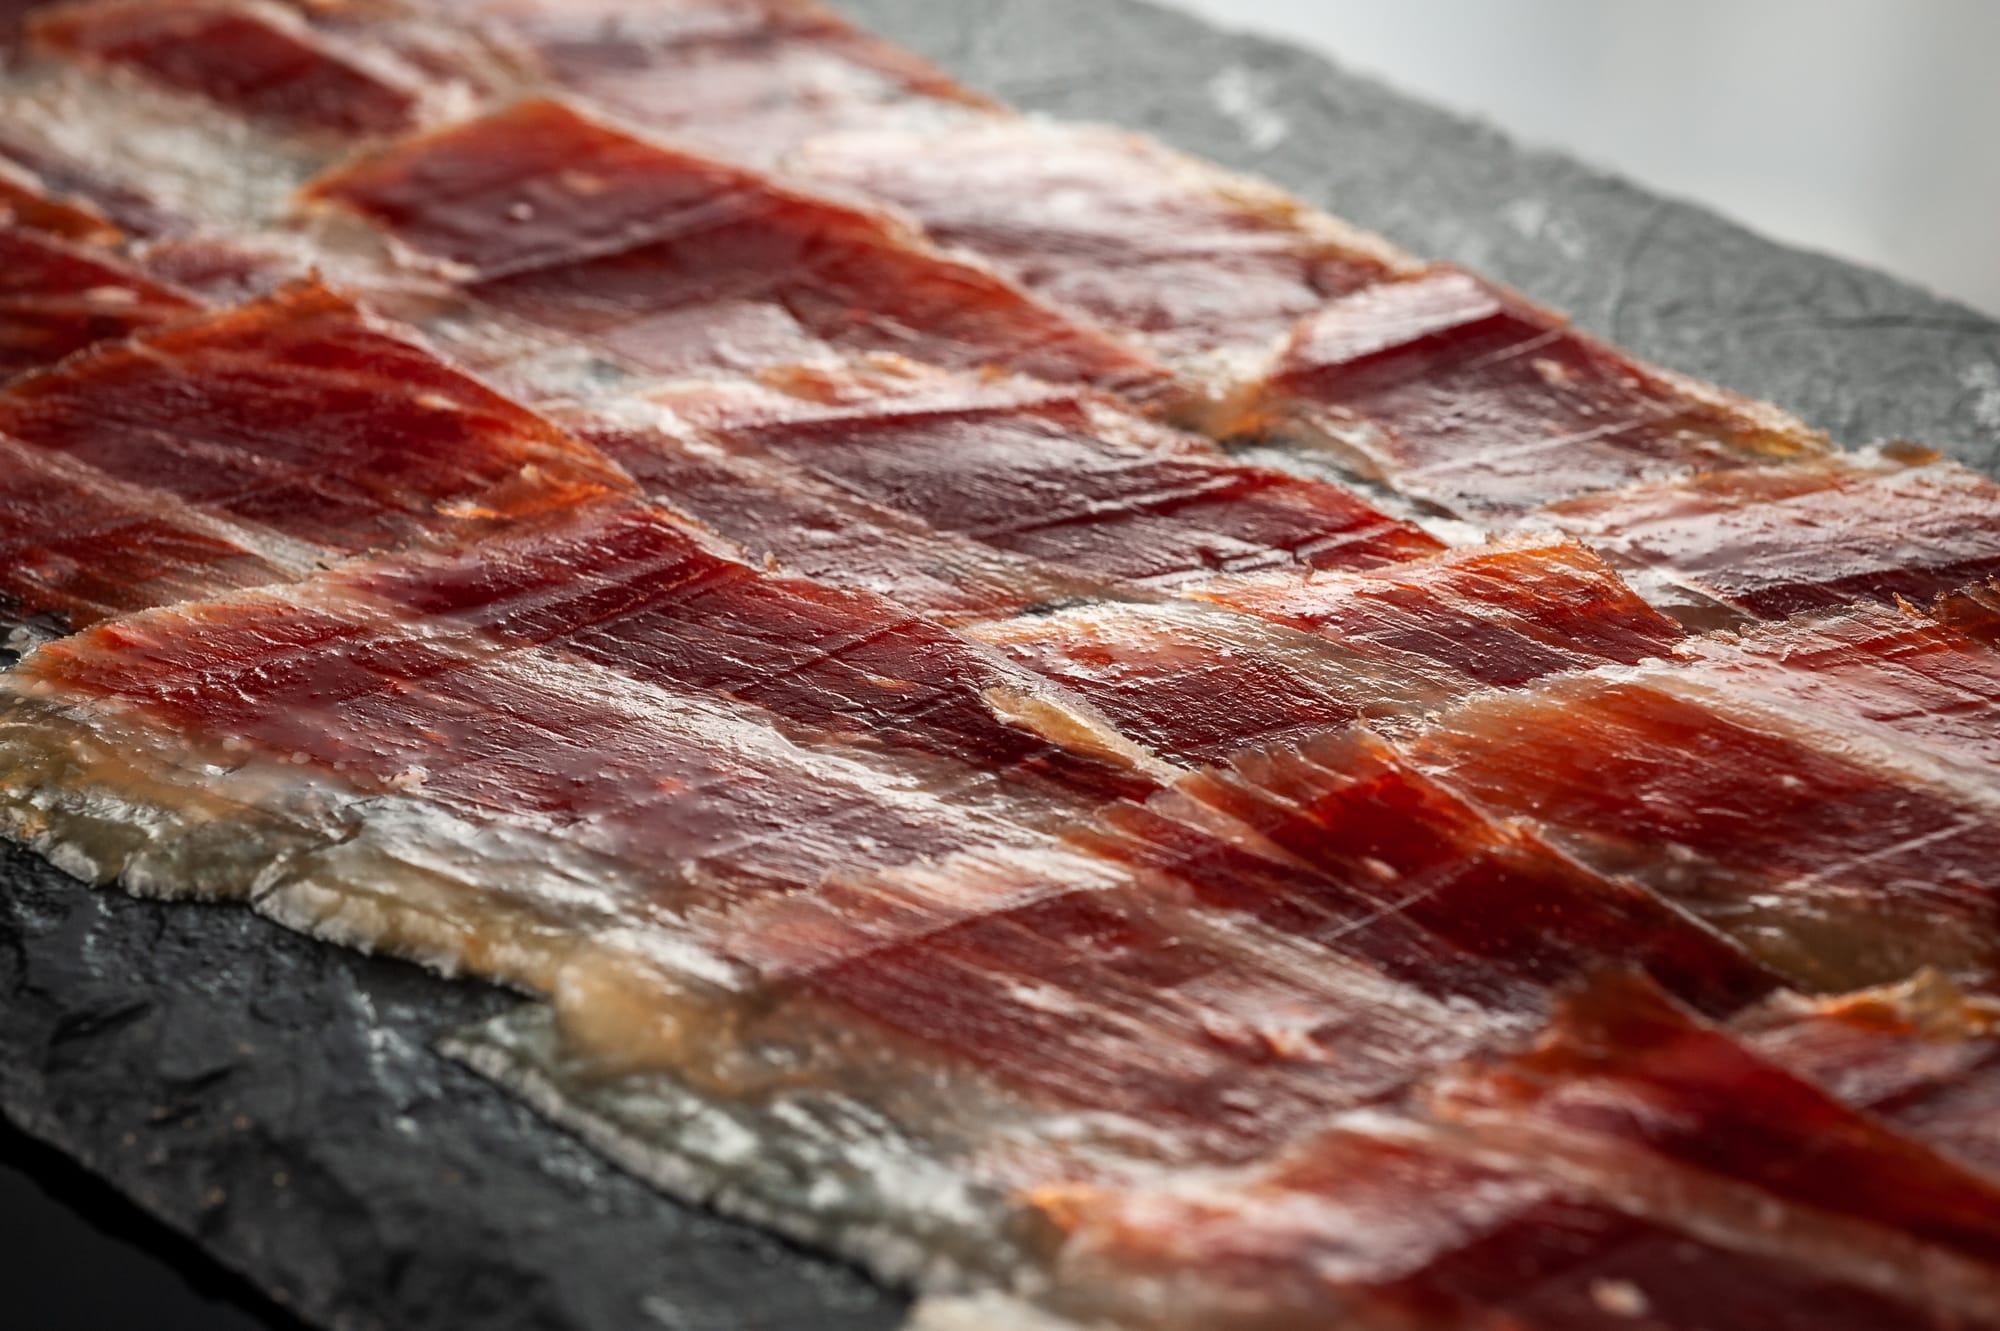
- Start with the Maza: With the hoof up, make long, smooth strokes parallel to the bone. Each slice should be translucent and about 4 centimeters long, roughly the width of the leg.
- Trim as You Go: Gradually remove small strips of rind or outer fat as you move deeper. This keeps the surface fresh and prevents the rest from drying out.
- Stay Flat: Keep the knife level to maintain an even surface. Avoid sawing motions and let the knife glide.
- Mind the Bone: When you reach the hip or femur, use your boning knife to carefully separate the meat. This creates a clean plane to continue slicing.
- Rotate to the Other Side: Once you have finished slicing one side, it is time to rotate the ham and carve the opposite side using the same technique.
Remember, carving Ibérico ham is not about speed. It is about precision, patience, and respect for the craft.
Step 5: Serve, Store, and Savor
Lay slices flat and slightly overlapping on a room-temperature plate, fat-side visible. The warmth helps the fat begin to soften, releasing the ham's signature fragrance.
Pairings: Fermín's hams shine alongside Rioja or Cava, toasted bread rubbed with tomato (pan con tomate), or a handful of Marcona almonds.
Between servings, cover the exposed surface with one of the saved fat pieces, then wrap the leg loosely in cheesecloth or breathable plastic. Store in a cool, dry place between 60 and 70°F. Whole Fermín hams do not require refrigeration. Cover them with a clean kitchen cloth and a layer of fat to preserve aroma and freshness.
Step 6: Use It All
The meat near the bones that cannot be carved in slices can be cut into small cubes, or tacos, which are perfect for soups, croquettes, or sautéed dishes. The remaining bone can be simmered for broth, ensuring every bit of your Fermín ham is enjoyed.
Step 7: Honor the Craft
Every slice you carve is the result of years of tradition, from Fermín's free-range Ibérico pigs roaming oak-studded pastures during the Montanera season to the patient 18 to 36 month cures in La Alberca's mountain air.
Carving is your way of honoring that process and transforming patience, skill, and terroir into flavor. Slow down, enjoy the ritual, and let each glistening slice tell the story of Spain's most iconic ham.
Shop Fermín Bone-In Hams → https://www.crowdcow.com/ranch/fermin-iberico
Quick Tips at a Glance
- Always carve at room temperature.
- Slice thin and wide, never thick chunks.
- Keep knives sharp and surfaces clean.
- Cover exposed meat with reserved fat, not plastic wrap alone.
- Rotate the ham as you reach each section to maximize yield and flavor.